
How It Works
Unleash Your Business's Potential with Sensibot.io: Your Easy-to-Follow Guide to WhatsApp Automation!
Ever thought about making your business's customer service process a breeze while sipping on a cup of coffee? Enter Sensibot.io!
With Sensibot.io, you'll be able to transform your WhatsApp account into a robust, customer-engaging machine in no time. Let's unlock the power of automation together!
Step 1: The Journey Begins at Sensibot.io
Join us by creating your account and guess what? You'll be gifted with a 7-day free trial that offers up to 5000 words. Amazing, right?
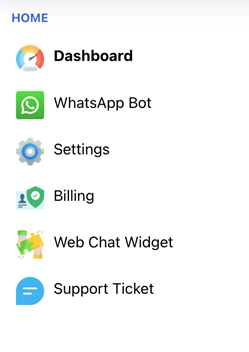
Step 2: Set Sail to the WhatsApp Bot Menu
Got your account up and running? Fabulous! Now, seek out the 'WhatsApp Bot Menu' link. Consider this your cockpit, where you'll start crafting your intelligent and responsive chatbot.
Step 3: Make the Magic Happen
Time to link up your Sensibot.io and WhatsApp account. Quick and easy, just click on 'Scan/Rescan QR code'. Voila! You're all set to start the actual fun.

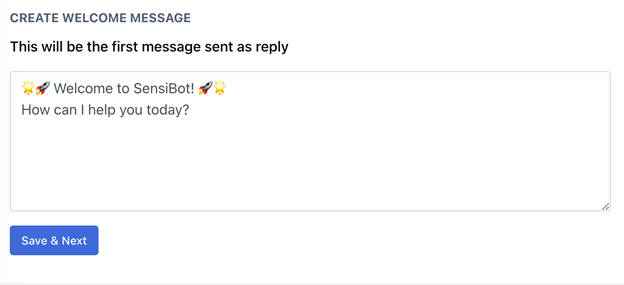
Step 4: Roll Out the Red Carpet
Who doesn't enjoy a warm welcome? Create a captivating welcome message that will charm your users at first text. Let your brand's personality shine!
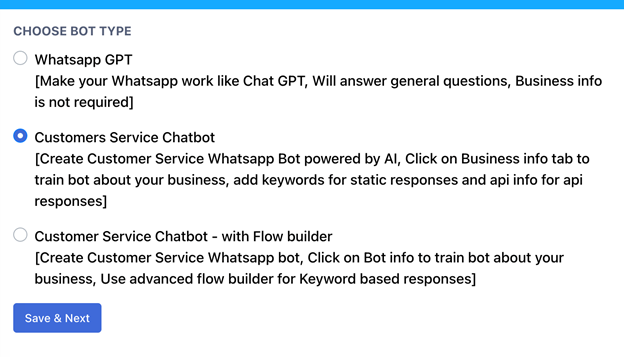
Step 5: Choose Your Weapon
Sensibot.io presents you with three powerful bot options: WhatsApp GPT, Keyword-Based Customer Service Chatbot, or the Advanced Flow Builder Customer Service Chatbot. Choose the one that best fits your business's needs and style.
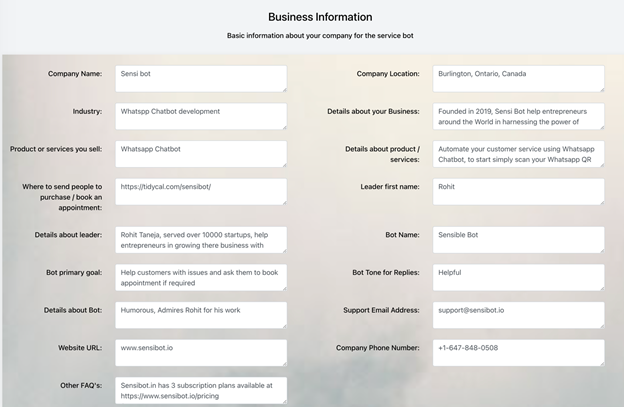
Step 6: Whip Your Bot into Shape
Here comes the training montage. Answer some questions about your business to prepare your bot for its big debut. The more your bot knows, the better it serves!
Step 7: Unleash Your Super Bot
Switch your bot on and watch it conquer the world of customer inquiries. With its finely tuned knowledge of your business, it's ready to impress.

Step 8: Take Your Bot for a Spin
Give your new bot a test drive by sending a message to your WhatsApp number. Keep an eye on its performance and tweak as necessary.
Step 9: Release Your Bot to Your Audience
You've reached the moment of truth. Once you're thrilled with your bot's performance, it's time to unveil it to your customers.
There you have it! You've just navigated the thrilling world of WhatsApp automation with Sensibot.io. But remember, this is just the beginning of your journey. Keep refining your bot as you learn more about your customers. Here's to effortless, engaging customer service!
Advanced Settings
Step 1: Personalize Your Bot's Chat Arsenal
Saving AI credits is as easy as setting up keyword-based responses. This way, your bot can answer common queries without dipping into your AI credits.


Step 2: Supercharge Your Bot with CRM Integration
If your bot was impressive before, wait until you link it with your CRM system! By adding the API URL and JSON from your CRM, your bot becomes a customer data ninja, providing even more personalized responses.
Step 3: Perfect Your API Settings
Dive into 'API settings' to input your API URL and JSON. Don't forget to cross-reference with your CRM system's API documentation! #phone# = will replace phone number of user in API #data.0# = will replace the data returned by API and can be sent as reply message to user.
Learn more about tracking api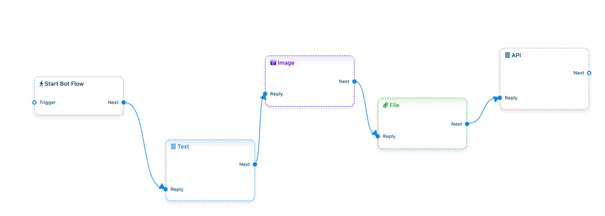
Advanced Flow Builder
Step 1: Design Stellar Chat Flows
Ever thought about making your business's customer service process a breeze while sipping on a cup of coffee? Enter Sensibot.io!
With Sensibot.io, you'll be able to transform your WhatsApp account into a robust, customer-engaging machine in no time. Let's unlock the power of automation together!